How to Build an Upcycled Multi-Compartment Compost Bin for Backyard Soil Management
Establishing a household composting system is one of the most effective ways to divert organic waste from landfills while simultaneously enhancing backyard soil structure and nutrient fertility. However, gardeners seeking a durable, attractive setup often face a common hurdle: the price of commercial equipment. Ready-made wooden compost bins available through retail channels frequently cost anywhere from $70 to $350. Beyond the direct financial outlay, commercially manufactured units carry an environmental footprint associated with raw material processing, factory manufacturing, and long-distance shipping.
An accessible, highly sustainable alternative has been highlighted by the homesteading channel Green homestead. By utilizing pruned tree branches as structural corner posts and pairing them with upcycled wooden boards, gardeners can build a sturdy, customizable double-sided compost bin. This design relies on locally scavenged or repurposed materials, significantly lowering cost barriers while offering an adaptable framework for managing active household waste.
The Mechanics of Multi-Compartment Composting Systems
For home gardeners focused on efficiency, active or “hot” composting provides the fastest path to nutrient-rich organic matter. Achieving and maintaining the temperatures required for rapid breakdown depends heavily on the overall mass of the pile. To support hot composting, an individual compartment must measure at least 3 feet wide, 3 feet long, and 3 feet deep. Volumes smaller than this threshold struggle to retain heat, slowing down the decomposition process.
While a single-bay system can process waste, a multi-compartment design offers substantial operational advantages. By doubling the length to create two side-by-side bays—or tripling it for three—gardeners create a staged workflow:
- Active Intake Bay: Receives fresh daily kitchen scraps, yard waste, and carbon sources.
- Aging and Curing Bay: Holds older material undergoing uninterrupted decomposition, allowing microorganisms to finish breaking down matter without the continuous addition of raw waste.
- Harvest Access: Enables easy removal of fully finished, garden-ready compost from one section without disturbing the active processing taking place in another.
As organic matter matures, it can be turned and shifted across the shared internal divider into the adjacent compartment, ensuring a continuous supply of finished soil amendment throughout the growing season.
Site Selection and Ground Preparation
Before assembling the wooden structure, selecting an optimal location within the yard is critical for long-term function. A successful compost site requires two primary environmental conditions:
First, the chosen site must offer reliable drainage. Excess water accumulation can turn a compost pile anaerobic, causing unpleasant odors and stalling decomposition. Second, placing the bin in a location that receives ample sunshine helps elevate internal temperatures, which accelerates microbial activity and speeds up the breakdown of tough organic materials.
Once a suitable site is chosen, layout precision ensures the final structure remains square and sturdy. Gardeners can map out the bin footprint using a measuring tape, ground pegs, and string. Alternatively, non-toxic layout tools such as Testors Yellow Matte Washable Spray Chalk offer a clear visual guide on the ground surface without contaminating the surrounding soil or leaves, as the chalk is water-based and safe for backyard environments.
Gathering Tools and Upcycled Materials
The primary advantage of this upcycled bin design is its reliance on readily available items. Instead of purchasing milled dimensional lumber for the primary framework, structural supports are harvested directly from pruned tree branches or repurposed timber posts. The remaining components can generally be gathered from salvaged shipping pallets, leftover fence pickets, or scrap construction boards.
To complete the build, the following tools and materials are required:
- Structural Corner Posts: A bundle of thick, pruned tree branches or timber posts.
- Horizontal Siding: Repurposed wooden boards or planks, cut to match the intended width and depth of the compartments.
- Fasteners: A generous supply of wood screws.
- Power Tools & Hardware: A drill, a hand or electric saw for trimming boards, and an axe for shaping ground stakes.
- Measuring & Layout Tools: Measuring tape, string, pegs, or washable spray chalk.
Because the construction is modular, running short on wooden boards does not derail the project. Additional planks can be integrated into the walls at any point as more reclaimed material becomes available.
Step-by-Step Framing and Structural Assembly
Assembly begins with preparing the vertical corner posts. Using an axe, sharpen one end of each pruned branch into a pointed stake. These sharpened posts will be driven directly into the ground to anchor the bin without requiring concrete footings or complex joinery.
If the backyard soil is dense, dry, or hard packed, driving natural branches deep enough for stability can be challenging. To resolve this, soak the marked installation site with water using a garden hose for up to 10 minutes the day before building. This softens the earth, allowing the sharpened branch posts to penetrate smoothly when hammered into place along the mapped boundary lines.
Once the corner posts are firmly driven into the earth, prepare the horizontal cladding:
- Measure and cut the upcycled wooden boards to fit the rear, side, and internal dividing spans.
- Position the first row of boards flat against the base of the posts at ground level.
- Secure each board firmly to the posts using wood screws driven via a power drill.
- Stack and screw subsequent boards upward to form solid rear and side walls. Adjacent bays will naturally share a central dividing wall, minimizing the total number of boards required.
Optimizing Front Wall Access
A common mistake in DIY compost bin construction is building all four outer walls to the same height. Compost piles require regular maintenance, including periodic turning to introduce oxygen, as well as routine filling and harvesting. High front walls create an awkward barrier that makes pitching heavy organic material with a fork difficult.
To maintain easy access, the front wall of each compartment should be constructed to roughly half the height of the back and side walls. This lower retaining barrier keeps loose material contained within the bay while allowing gardeners to comfortably reach inside with a pitchfork or shovel. The open upper half also improves airflow across the top layer of the pile.
Stocking and Managing Carbon-to-Nitrogen Balances
Once the structural frame is completed, the bin can immediately be put into service. Achieving rapid breakdown within a open wooden bin depends on establishing a balanced combination of organic materials inside the compartment.
Compostable material falls into two main categories:
- Carbon-Rich “Brown” Materials: Dry, absorbent items such as fallen leaves, sawdust, wood chips, and shredded paper. These supply structural bulk and carbon for microbial energy.
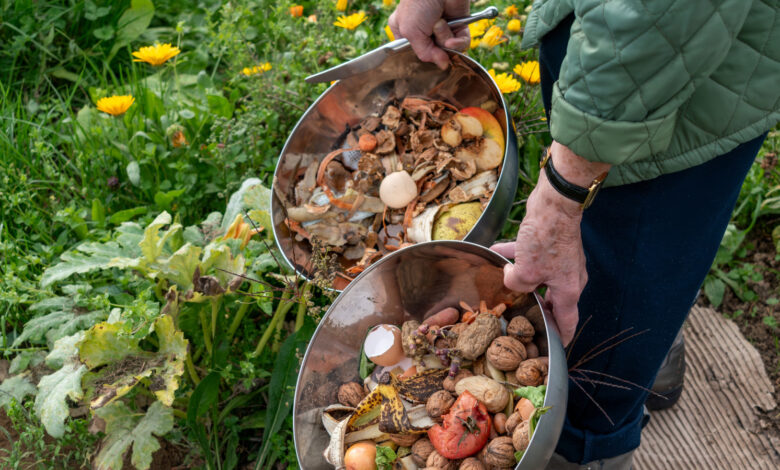
- Nitrogen-Rich “Green” Materials: Fresh waste such as vegetable trimmings, fruit peels, and fresh grass clippings. These provide nitrogen needed for microbial protein synthesis and heat generation.
Successful compost operations maintain a carbon-to-nitrogen (C:N) ratio generally ranging from 2:1 up to 35:1 depending on the specific inputs used. Layering or mixing green waste with brown materials prevents dense items like grass clippings from matting together, maintaining structural air pockets throughout the pile. With proper moisture, sunlight exposure, and periodic movement between the double compartments, this simple upcycled wooden bin provides an economical, durable framework for turning everyday household waste into valuable garden soil.